In my recent post about building stocks for wooden boats I mentioned using a water level for getting things aligned on the building stocks but I didnt explain how it works.
A water level is the most basic of measuring instruments and is very easy to use. Properly used it is very accurate but there are some principles that need to be taken into account in order to achieve that accuracy. If you ignore them then you can work on blindly assuming accuracy that is not really there.
A water level works on the basic principle that water will always find its own level; it will flow from where the surface of the water is highest to where it is lowest, until the two are equal. It is a simple tube with water inside it, open at the ends so that atmospheric pressure can push down on the exposed surfaces. It can be done with a simple length of clear plastic tubing, or it can be an ordinary garden hose with a length of clear plastic tube attached at each end so that you can see the level of the water.You will need about 500mm (20") of empty tube above the water level, to prevent water from running out one end when moving the tube from one bulkhead to the next.
To get two equal-level points on any structure, place the tube against the structure both at your reference mark and where you want to place the new mark. Raise or lower the tube at your reference mark until the water surface inside the tube is exactly at the level of the reference point. At the other end of the tube, draw a mark on the structure exactly in line with the surface of the water inside the tube. Ideally it needs two people working together, with one at each end of the tube to make fine adjustments to get the reference level correct but it can be done by one person if the tube ends are secured against the structure.
You can use this when setting up a bulkhead so that it is level across the boat. First, the bulkhead must have the waterline drawn accurately on the face, which should be done on the workshop floor when drawing the bulkhead for cutting. Position the bulkhead on its legs with clamps, with the centre of the bulkhead at the centrepoint of the building stocks. Position your water level so that the water is at the level of the waterline at one end. Raise or lower the other end of the bulkhead until the marked waterline is exactly at the level of the water in the tube. Check the transverse alignment of the bulkhead on the stocks with a plumb line attached to the centreline string above your building stocks, as described in my previous post about building stocks for wooden boats. Similarly, use the water level to set up other bulkheads at the same level as the first one.
Simple isnt it? But, it has potentials for error that you must take into account, or your new mark will not be accurately placed.
- Dont use a tube that is smaller than about 12mm (1/2") diameter. The smaller the diameter the slower it will be to react to adjustments in level, due to friction of the water against the wall of the tube. The larger the tube, the more easily the water will flow and the faster it will react. The large tube also has more water surface exposed to atmospheric pressure, helping to speed the reaction. A tube of 16-20mm (5/8-3/4") diameter is ideal.
- Dont use a tube that is excessively long. Ideally it will be long enough to reach the most distant point to be marked, with a bit extra to allow the tube to lie on the ground. Any additional length increases the friction in the tube due to increased surface area. It also allows the tube to lie in loops that will slow the movement of the water and possibly trap air to form airlocks. An airlock can stop movement of the water almost completely.
- Purge all air bubbles out of the tube before you start. Air bubbles will affect the accuracy of your readings and will slow the movement of the water inside the tube. The smaller the tube, the more that it will be adversely affected by air bubbles.
- Try to do your work in fairly stable conditions, so that the tube and water are not heating up and affecting the readings. Warm water will flow more easily than cold water and a warm tube will expand in diameter, holding more water. You dont want the tube to be moving between sunshine and shade because the expansion/contraction of the tube and water are likely to affect accuracy. This is particularly important if you are using a dark-coloured garden hose with clear plastic ends because the hose and water will expand considerably in sunlight.
- Dont be in a rush to mark your new reference line. It takes a few moments for the water to find its level before you can make your mark. It will first surge up and down a few times before it stops. This is when you will see the importance of a tube that is not too small because it is possible for the friction inside a small tube to overcome the atmospheric pressure and give inaccuracy of 20mm (3/4") or more for awhile before it very slowly equalises.
- Flick the tube with your fingernails before assuming that it has found its final level. The shock waves running through the water will help it to stabilise at the correct level.
- Dont do this work in windy conditions. Wind blowing over either or both of the open tube ends will exert a venturi effect and change the readings. The air flowing across the mouth of the tube forms a vacuum inside the tube. That sucks the water up the tube, so the level will be higher at that end than the other. Even if the wind is blowing over both ends, it must be exactly the same speed over both ends at all times to have no effect, a very unlikely situation. If you must work in the wind, make sure that both ends of the tube are well sheltered from the wind. If the wind is strong then just dont do it because wind blowing over a bulkhead will cause high pressure on one side and low pressure on the other, so you will be unsure of the accuracy of your readings.
- Tie a length of string to each end of your tube. Between readings, tie the strings to something at about the same level as your reference line. This will prevent the tube from dropping down and emptying some of the water unexpectedly.
- When you have one bulkhead that is accurately set up and secured so that it cannot move in any direction, use that first bulkhead as your point of reference for the waterline when setting up all of the other bulkheads. Dont move the reference point to any other bulkhead because you could end up with a cumulative error, which is minimised by always working with the same origin as reference.
- Buy or make some tight-fitting bungs to plug the ends of the tube. It does not matter whether they are rubber, plastic or wood, but they should be non-porous. Use them to keep the water inside the tube when not in use.
I have no images of water levels of my own but Roy McBride of CKD Boats kindly supplied the images below, with permission to use them. His company is my agent in South Africa and supplier of plywood kits for many of our designs.
 |
| Two water level tubes. The one at left is discoloured by age but still usable. A simple plastic tube and water. |
 |
| Both ends plugged with bungs to keep the water in. |
 |
| This illustrates the principle. The tops of the lower two pieces of tape are level with the top of the water at opposite ends of the tube, so they are level with each other. Here they are close together but they could be 10m apart without any loss of accuracy. |
 |
| Close-up of the tube and water surface. |
Thank you Roy and CKD Boats for allowing the use of your photos.
To see our range of boat designs, for both amateur and professional builders, please go to http://dixdesign.com/.


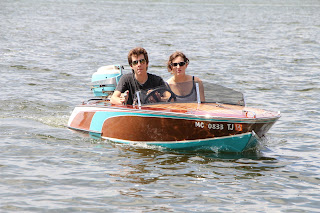
 Some people call my boat "The Coffee Table" as it has a bit of a furniture quality look to it. One of these people is Lisa Lirones, the wife of Bruce Lirones, who inspired me to build a boat, and the mother of Brett Lirones, my daughters boyfriend. Lisa is a professional photographer. The Lirones came for a visit during the Woodward Dream Cruise, so we went out on the lake and Lisa took a few million photos so Ill post a few of them. She captured a few water spots in the making.
 The only person not pictured is Lisa, since she took all the photos.